Introductions
Welcome! The following is your home for the NativeScript Developer Day workshop, being held on September 19th, 2016, in Boston, Massachusetts. Below you’ll find all slides and instructions for the hands-on activities being held throughout the day. The site will remain up well after the event so you can refer back to the material at any time.
Prerequisites
All attendees must have the NativeScript CLI installed, and all system requirements in place to develop for either iOS or Android. If you haven’t already, complete the installation instructions using the link below.
TIP: If you run into issues completing the setup instructions, try joining the NativeScript Slack and asking questions in the #getting-started channel.
What is NativeScript?
We’ll start the day with a brief introduction to what NativeScript is, and why you might want to use NativeScript to build your next mobile app. Because we know you’re not here to see us talk in front of slides all day, we’ll keep this short and to the point.
The basics
For our first hands-on workshop, you’ll learn how to build and manage NativeScript apps, as well as how to make simple changes and debug your code.
How the CLI works
The CLI allows you to perform various tasks from creating a new project, to building an app, to importing plugins, and a whole lot more. All the CLI commands start with a prefix tns.
Exercise: Create your first project
Open your terminal (Mac) or command-line console (Windows) and navigate to the folder where you want to create your first project. Now run the following command:
tns create WorkshopOne --ng
WorkshopOne is the name of the project, while --ng tells the CLI to create an ng2 type of project.
When complete, navigate into the created project folder:
cd WorkshopOne
At this point we have a hello world type of project, with a bit of simple logic. Now we need to add the platforms for which we want to build this app.
Exercise: Adding mobile platforms
To add Android to your project run:
tns platform add android
If you’re on a Mac, add iOS with
tns platform add ios
Now we will learn how to build and run your apps.
Exercise: Running the app
To build an Android app, and run it on a connected device or Genymotion instance, call:
tns run android
However, if you want to run the app in an emulator you should call
tns run android --emulator
The same applies to building and running iOS apps—just swap android for ios
tns run ios --emulator
Note: If you want to stop the build process just press
CTRL+C.
Sometimes waiting for the build process can take some time, especially when you need to rebuild the app every time you make a tiny change to the code.
This is why the CLI has the livesync command, which allows you to build the app in a way that whenever you make a change in your code the app will get refreshed really quickly.
To make it more insteresting, if you make a change to your TypeScript code, the CLI will transpile it to JavaScript first, and then refresh the app.
Exercise: Livesync
Build your app using the livesync command and then open your app.css file, such as adding color: red to the .title selector, and save the file.
Note: You’ll need to stop the previous
runcommand withCTRL+C.
tns livesync android --watch
or
tns livesync ios --emulator --watch
NativeScript folder structure
At the root of the project we have package.json, which contains all npm dependencies and project configuration.
This is where you can change the id of the project or the app version.
On top of that NativeScript project is made of a number of folders, however you should mainly pay attention to 3 of them.
the app folder
This is where the code of the application goes.
Some of the most notable files here are:
main.ts- is where the application starts. It is also the file where you can initialize the routing configuration for page navigation.app.css- is the global css file, the styling contained here is applied accross the whole of the applicationapp.component.ts- by default it contains the first angular component that gets loaded when you run the app, however most apps that you will work on will probably use a different component as the starting one.App_Resources- this folder contains platform-specific files, such as icons, splash screens, and Android and iOS configuration files.
the node_modules folder
This folder contains all npm modules specified in the package.json.
This folder can be easily regenerated, this means that you can safely delete it whenever you feel like.
You should also refrain from pushing the folder into git or any source control.
the platforms folder
This is the build folder for each of your platforms.
Just like the node_modules folder, this folder can be regenerated at will, so you should never add it to your source control.
Working in Visual Studio Code
There are a number of IDEs that you might be used to work with, however for the purpose of this workshop we will focus on working with VS Code, which has a lot of really good features that can help you build NativeScript apps.
Exercise: Setting up the IDE
Download Visual Studio Code from its official download page and install it.
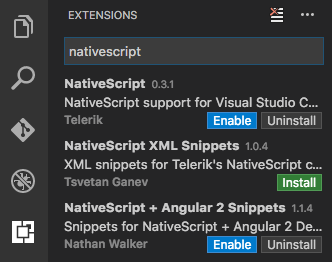
Now we will add NativeScript extensions to Visual Studio Code.
Just run VS Code and go to the Extensions tab (on Cac press shift + command + x on windows press shift + ctrl + x).
From here search for 'nativescript', once the search returns reults install NativeScript and NativeScript + Angular 2 Snippets.
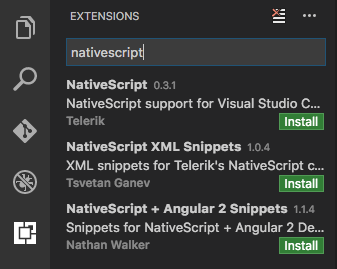
Installing each them shouldn't take too long, once ready you will be prompted to enable the extensions, just click on “enable” next to one of the modules, which will restart VS Code and you will be ready to go.
Now that VS Code is ready, let's see how it can be of service. We will start by playing with code snippets.
Exercise: Using code snippets
First open the WorkshopOne project folder in VS Code by using File -> Open.
Then find app\app.component.html (this file contains the UI definition of app.component).
Add a new line just before the closing </StackLayout> tag and start typing ns immediately you will get a list of available snippets. If you keep typing the list of available snippets will narrow down.
When you select one of the snippets and hit enter the text you were typing will be replaced with a snippet. Some snippets will have more than one place where you can type, you can tab through them.
For this exercise add the following components using code snippets.
- Label with the
textset toEmail:->nslabel - TextField with the
hintset toemail...->nstextfield - Label with the
textset toPassowrd->nslabel - TextField with the
hintset topassword...->nstextfield - Button with the
textsetSign Inandtapset tosignIn()->nsbtn
Try to add the snippets on your own, but if you need help show the solution below.
<Label [text]="message" class="message" textWrap="true"></Label>
<Label text="Email:" textWrap="true"></Label>
<TextField hint="email..." text=""></TextField>
<Label text="Password:" textWrap="true"></Label>
<TextField hint="password..." text=""></TextField>
<Button text="Sign In" (tap)="signIn()"></Button>
Now open app.component.ts and add the following function to the AppComponent class:
public signIn() {
    alert("NativeScript is great");
}
When done, run the app and see what you got.
VS Code also provides support for debugging NativeScript code, and to make it even more interesting, the extension also lets you debug directly in TypeScript.
Exercise: Debugging in VS Code
Open the debug tab - click the debug icon on the left-hand side: ![]()
From here press the little gear icon to Select the build environment and choose NativeScript
![]()
When the IDE is ready, click on the drop down next to the gear icon and select:
Attach on Android or Attach on iOS and press the green play button.
This might take a minute or two, especially when you run it for the first time.
NOTE: If the debugger detaches after the app started, re-select
Attach on iOSand press play. This should fix the problem.
As part of this exercise open app.component.ts and add a breakpoint to the onTap function by clicking to the left of the line number where you’d like to add the breakpoint. And then tap on the tap button in your app.
The debugger should stop at your breakpoint.
Here is how I did it:
When you are in debug mode you can:
- hover over variables to check their value or add them to the watch list
- step in or step over the code
use the
Debug Consoleon the bottom of the screen to run commands or read/edit variables.Try to change the value of the
counterby running the following command in theDebug Console.this.counter = 100;
The user interface
Now that you’ve gotten a feel for how NativeScript apps work, let’s shift our focus to the user interface. In our second hands-on workshop, you’ll learn about using UI components, styling them with CSS, and animating them with NativeScript’s robust animation library. In this workshop, we'll create an adorable Kitten Adoption app with a card interface.
Adding UI components
Exercise: Create a new app
Let's create a new NativeScript app for this workshop:
tns create WorkshopTwo --ng
Next, change directories into your new project:
cd WorkshopTwo
Open this new project up in Visual Studio Code (you can type code .).
First, let's take a look at the files we will need to work with. Notice in the /app folder of your project there is a file called app.component.ts. This is where you put the functions that are called by the front-end file, app.component.html.
Open app.component.html and delete everything there.
Start your app's livesyncing process on iOS by typing into the command line:
tns livesync ios --watch
For Android, we recommend using Genymotion; open Genymotion and start livesync by typing
tns livesync android --watch
Now, when you make changes to your code, your app will refresh in the emulator.
Exercise: Add your first UI element
Native apps need native-looking controls. We will create a native ActionBar using XML markup. In app.component.html, put this line at the top:
<ActionBar title="Adopt A Kitten!"></ActionBar>
Before we go further, we need some data that we can layout on the screen. Let's grab ten kitten images from placekitten.com to have them ready to place on our app screen.
Note: If your iOS app complains about not being able to load insecure content, follow the instructions here and rebuild your app by running
tns run ios.
Exercise: Get some data ready
We won't go into the details now of binding your data to UI as you'll cover this in the next workshop.
Open app.component.ts and delete everything there. Replace it with the code below:
import {Component} from "@angular/core";

@Component({
    selector: "my-app",
    templateUrl: "app.component.html"
})
export class AppComponent {
    public kittens: Array<any>;
    public url: string;
    public counter:number = 200;

    constructor() {
        this.kittens = [];
        this.url = 'https://placekitten.com/200/';

        for (var i = 0; i < 10; i++) {
            this.counter++;
            this.kittens.push(this.url+this.counter);
        }
    }
}
We'll use this data in our layout in the next section.
Types of layouts
There are five basic layouts offered by NativeScript that correspond to standard native ways of laying elements out onto a page: StackLayout, GridLayout, WrapLayout, DockLayout, and AbsoluteLayout. Let's take a look at these, and, as a bonus, a ListView.
Exercise: Experiment with layouts
One of the simplest layouts is a StackLayout, which simply stacks elements on top of each other. Paste this code under the ActionBar:
<StackLayout horizontalAlignment="center">
    <Image [src]="kittens[0]" stretch="none"></Image>
    <Image [src]="kittens[1]" stretch="none"></Image>
    <Image [src]="kittens[2]" stretch="none"></Image>
</StackLayout>
If you want your content to simply wrap, use WrapLayout. Delete the StackLayout and replace it with this snippet:
<WrapLayout>
    <Image src="https://placekitten.com/100/100" stretch="none"></Image>
    <Image src="https://placekitten.com/100/100" stretch="none"></Image>
    <Image src="https://placekitten.com/100/100" stretch="none"></Image>
    <Image src="https://placekitten.com/100/100" stretch="none"></Image>
    <Image src="https://placekitten.com/100/100" stretch="none"></Image>
    <Image src="https://placekitten.com/100/100" stretch="none"></Image>
    <Image src="https://placekitten.com/100/100" stretch="none"></Image>
    <Image src="https://placekitten.com/100/100" stretch="none"></Image>
    <Image src="https://placekitten.com/100/100" stretch="none"></Image>
    <Image src="https://placekitten.com/100/100" stretch="none"></Image>
</WrapLayout>
If you need to position your element in an exact spot, use AbsoluteLayout. Delete the WrapLayout and replace it with the following snippet:
<AbsoluteLayout>
     <Image [src]="kittens[0]" left="100" top="100" width="200" height="200" ></Image>
</AbsoluteLayout>
Delete the AbsoluteLayout, and try a grid layout by replacing the AbsoluteLayout with the snippet below. You can have control over the format of your grid by tweaking the '*' values. Note the columns/rows vs col/row values.
<GridLayout columns="*,*,*" rows="*,*,*,*">
    <Image [src]="kittens[0]" col="0" row="0" colSpan="2" rowSpan="2" stretch="aspectFill" class="img"></Image>
    <Image [src]="kittens[1]" col="2" row="0" stretch="aspectFill" class="img"></Image>
    <Image [src]="kittens[2]" col="2" row="1" stretch="aspectFill" class="img"></Image>
    <Image [src]="kittens[3]" col="0" row="2" stretch="aspectFill" class="img"></Image>
    <Image [src]="kittens[4]" col="1" row="2" stretch="aspectFill" class="img"></Image>
    <Image [src]="kittens[5]" col="2" row="2" rowSpan="2" stretch="aspectFill" class="img"></Image>
    <Image [src]="kittens[7]" col="0" row="3" colSpan="2" stretch="aspectFill" class="img"></Image>
</GridLayout>
If you need elements 'docked' onto the top, bottom, and/or sides of your app interface, try a DockLayout by overwriting the GridLayout with this snippet:
<DockLayout>
    <Image dock="left" width="80" [src]="kittens[0]" stretch="aspectFill"></Image>
    <Image dock="top" height="80" [src]="kittens[1]" stretch="aspectFill"></Image>
    <Image dock="right" width="80" [src]="kittens[2]" stretch="aspectFill"></Image>
    <Image dock="bottom" height="80" [src]="kittens[3]" stretch="aspectFill"></Image>
    <Image [src]="kittens[4]" stretch="aspectFill"></Image>
</DockLayout>
Bonus! Finally, try a ListView by overwriting the DockLayout snippet with the snippet below. ListViews aren't a layout per se, but deserve to be tried out. This one has some fancy layouting with left and right alignment:
<ListView [items]="kittens">
    <template let-item="item" let-odd="odd" let-even="even">
        <DockLayout>
            <Image [src]="item" width="50" height="50" dock="{{ odd ? 'left' : 'right' }}"></Image>
            <Label text="minou" textWrap="true" horizontalAlignment="{{ odd ? 'left' : 'right' }}"></Label>
        </DockLayout>
    </template>
</ListView>
You can mix and match layouts, and have full control over the way your app looks using proper layouting.
Create a card layout
Now it's time to have some fun with creating a little functional layout for our kitten adoption app. We're going to create a card layout by combining StackLayout and WrapLayout.
Exercise: Place the kitten images in a scrolling StackLayout
What happens if you just put an array of kitten images within a StackLayout?
In app.component.html, replace any code you have under the ActionBar with this snippet:
<StackLayout>
    <Image src="https://placekitten.com/300/300"></Image>
    <Image src="https://placekitten.com/300/300"></Image>
    <Image src="https://placekitten.com/300/300"></Image>
    <Image src="https://placekitten.com/300/300"></Image>
    <Image src="https://placekitten.com/300/300"></Image>
</StackLayout>
The images are stacked, but they don't scroll.
Nest your StackLayout into a ScrollView:
<ScrollView>
  <StackLayout>
      <Image src="https://placekitten.com/300/300"></Image>
      <Image src="https://placekitten.com/300/300"></Image>
      <Image src="https://placekitten.com/300/300"></Image>
      <Image src="https://placekitten.com/300/300"></Image>
      <Image src="https://placekitten.com/300/300"></Image>
  </StackLayout>
</ScrollView>
It's all fine to add images manually to an app, but any data-driven app will need to have data loaded dynamically. Let's get our StackLayout to loop, so we can start creating cards.
Exercise: Create the kitten cards
In app.component.html, replace the current ScrollView with a layout that is generated dynamically:
<ScrollView>
    <StackLayout *ngFor="let kitten of kittens">
       <Image [src]="kitten"></Image>
    </StackLayout>
</ScrollView>
Notice the actual images (there should be 10) aren't laid out in a loop. We need to nest our layout to do this.
Exercise: Dynamically layout the cards
In app.component.html, replace the current ScrollView with a WrapLayout that will allow the StackLayout to loop.
<ScrollView>
    <WrapLayout>
        <StackLayout *ngFor="let kitten of kittens">
           <Image [src]="kitten"></Image>
        </StackLayout>
    </WrapLayout>
</ScrollView>
This allows the layout to loop, but the cards don't look very good. Let's control the width of the cards by making their width a percentage and align them horizontally:
<StackLayout width="40%" *ngFor="let kitten of kittens" horizontalAlignment="center">
Next, align the cards to the center by controlling the alignment of the WrapLayout:
<WrapLayout horizontalAlignment="center">
Now we have a wrapping layout of cards dynamically loaded onto the screen!
The final thing we want to do to these cards is to add a caption underneath the image. Add a caption of your own under the image:
<Label text="p'tit minou" horizontalAlignment="center" class="text"></Label>
CHALLENGE!: Can you find a nicer way to layout these cards? Experiment with GridLayouts and AbsoluteLayouts. Show us your results!
Styling apps with CSS
The cards are laid out properly, but they don't look very good. Time to add some styles!
Exercise: Add some color
Choose a pallette of color from Coolors.co or another pallette generator of your choice.
The style sheet in the app folder is automatically associated to your project by its naming convention, so we just have to edit it.
Delete everything in app.css. Add some color to the ActionBar and the Page background by adding a few styles to this file:
Page {
    background-color: #EBEBD3;
}

ActionBar {
    background-color: #083D77;
    color: #EBEBD3;
}
Style the card by adding a css class to the StackLayout in app.component.html:
<StackLayout width="40%" *ngFor="let kitten of kittens" horizontalAlignment="center" class="card">
Finally, add styles to the card and its label by adding these styles to app.css:
.card {
    background-color: #DA4167;
    margin: 10;
    border-radius: 5;
}
.text {
    color: #EBEBD3;
}
Congratulations! With a bit of code, you've succesfully created a nice card interface!
Creating robust animations
The more mobile app development you do, the more you realize that clean animations are not just a 'nice-to-have', they are a 'must-have'. Fortunately, NativeScript makes animating components really easy!
Exercise: Animate a card
First, we need to pass through a reference to the card we want to animate, and we do that in the app.component.html XML by giving it an id and adding a function that will fire when we tap the card:
<StackLayout (tap)="animate(card)" #card width="40%" *ngFor="let kitten of kittens" horizontalAlignment="center" class="card">
Next, open app.component.ts and import the Animation library at the top:
import { Animation } from "ui/animation";
Then, build out the animate() function. Add this function under the constructor:
animate(card) {
    card.animate({ opacity: 0 })
        .then(function () { return card.animate({ opacity: 1 }); })
        .then(function () { return card.animate({ translate: { x: 100, y: 100 } }); })
        .then(function () { return card.animate({ translate: { x: 0, y: 0 } }); })
        .then(function () { return card.animate({ scale: { x: 3, y: 3 } }); })
        .then(function () { return card.animate({ scale: { x: 1, y: 1 } }); })
        .then(function () { return card.animate({ rotate: 180 }); })
        .then(function () { return card.animate({ rotate: 0 }); })
        .then(function () {
        console.log("Animation finished");
    })
    .catch(function (e) {
        console.log(e.message);
    });
}
As you can see, we are chaining several animations together using promises. When one completes, the next fires. Test your animation by clicking a card.
CHALLENGE!: Create a different animation using the Animation library as documented here: https://docs.nativescript.org/ui/animation
Now, let's take a look at the other way of animating elements on the screen—by using CSS keyframe animation. Let's make the cards fade in during the page loading process.
Exercise: Add a keyframe animation
To do this, we simply need to tweak the CSS, so open app.css and add a @keyframes rule named card:
@keyframes card {
    from { opacity: 0 }
    to { opacity: 1}
}
Then, add these lines to the .card class:
animation-name: card;
animation-duration: 4s;
opacity: 0;
The app should refresh and the cards will fade in.
Beyond the basics
You now know how to start NativeScript apps, and how to scaffold out a basic user interface. Now let’s dig deeper. In this workshop you’ll learn how to create Angular services, how to deal with data, and how to setup routing. Let’s start by building an Angular service.
Learning Angular 2 data binding, events, and services
In this workshop you’ll be building a simple grocery-management application. Let’s dive right in.
Exercise: Start up a new app
Go ahead and start up a new NativeScript app for this workshop:
tns create WorkshopThree --ng
Next, change directories into your new project:
cd WorkshopThree
After that, start a livesync watcher with either
tns livesync ios --watch
or
tns livesync android --watch
Open this new project up in Visual Studio Code and let’s start working with Angular services.
Exercise: Your first service
Replace the contents of app.component.ts with the code below, which creates a simple grocery list:
import { Component, OnInit } from "@angular/core";
import { GroceryService } from "./grocery.service";
import { Grocery } from "./grocery";

@Component({
  selector: "my-app",
  templateUrl: "app.component.html",
  providers: [GroceryService]
})
export class AppComponent {
  groceries: Array<Grocery>;

  constructor(private groceryService: GroceryService) {}
  ngOnInit() {
    this.groceries = this.groceryService.get();
  }
}
And then replace the contents of app.component.html with the code below, which shows the groceries on the screen:
<GridLayout>
  <ListView [items]="groceries">
    <template let-item="item">
      <Label [text]="item.name"></Label>
    </template>
  </ListView>
</GridLayout>
Next, create a file in the app folder named grocery.service.ts, and paste in the following code:
import { Injectable } from "@angular/core";
import { Grocery } from "./grocery";

@Injectable()
export class GroceryService {
  get() {
    let groceries = [];
    groceries.push(new Grocery("Bananas"));
    groceries.push(new Grocery("Apples"));
    groceries.push(new Grocery("Grapes"));
    return groceries;
  }
}
Finally, create another file in the app folder named grocery.ts, and paste in the following code:
export class Grocery {
  name: string;
  constructor(name) {
    this.name = name;
  }
}
At this point you should see a hardcoded list of data. Let’s refactor this app so that the data isn’t hardcoded.
Exercise: Allow users to add groceries
Update you app.css with the code below, which will add a bit of spacing to the app you’re building.
TextField, Button, Label {
  padding: 15;
}
Next, change your app.component.html file to use the code below, which sets up a UI that allows users to add data to the list.
<GridLayout>
  <GridLayout rows="auto, *">

    <GridLayout row="0" columns="*, auto">
      <TextField col="0" hint="Enter a grocery"></TextField>
      <Button col="1" text="Add"></Button>
    </GridLayout>

    <ListView row="1" [items]="groceries">
      <template let-item="item">
        <Label [text]="item.name"></Label>
      </template>
    </ListView>
  </GridLayout>
</GridLayout>
With that setup out of the way, let’s try a quick challenge.
Challenge: Adding a tap handler
NativeScript button elements have a tap event that you can subscribe to using <Button (tap)="functionName()">. Angular 2 lets you implement two-way data binding between a text field and a component property using the [(ngModel)] styntax, for instance <TextField [(ngModel)]="grocery">.
Your challenge is to combine the two, so that when the user taps the “Add” button they see the value they typed in the text field.
One last note before you get started: replace the contents of your main.ts file with the code below, which adds a NativeScriptFormsModule import you’ll need for this to all work.
import { platformNativeScriptDynamic, NativeScriptModule } from "nativescript-angular/platform";
import { NativeScriptFormsModule } from "nativescript-angular/forms";
import { NgModule } from "@angular/core";
import { AppComponent } from "./app.component";

@NgModule({
  declarations: [AppComponent],
  bootstrap: [AppComponent],
  imports: [NativeScriptModule, NativeScriptFormsModule]
})
class AppComponentModule {}

platformNativeScriptDynamic().bootstrapModule(AppComponentModule);
Use the following code for your app.component.html:
<GridLayout>
  <GridLayout rows="auto, *">

    <GridLayout row="0" columns="*, auto">
      <TextField col="0" hint="Enter a grocery" [(ngModel)]="grocery"></TextField>
      <Button col="1" text="Add" (tap)="add()"></Button>
    </GridLayout>

    <ListView row="1" [items]="groceries">
      <template let-item="item">
        <Label [text]="item.name"></Label>
      </template>
    </ListView>
  </GridLayout>
</GridLayout>
And the following code for your app.component.ts:
import { Component, OnInit } from "@angular/core";
import { GroceryService } from "./grocery.service";
import { Grocery } from "./grocery";

@Component({
  selector: "my-app",
  templateUrl: "app.component.html",
  providers: [GroceryService]
})
export class AppComponent {
  grocery: String;
  groceries: Array<Grocery>;

  constructor(private groceryService: GroceryService) {}

  ngOnInit() {
    this.groceries = this.groceryService.get();
  }

  add() {
    alert("You typed " + this.grocery);
  }
}
Reference:
Dealing with data
In this next section of the workshop you’ll enhance the small grocery list to allow users to add items to the list, and also to persist grocery lists to their devices.
Exercise: Allow users to add data
First, replace the contents of grocery.service.ts with the code below. The changes include removing the hardcoded list, as well as a new add() method.
import { Injectable } from "@angular/core";
import { Grocery } from "./grocery";

@Injectable()
export class GroceryService {
  private groceries: Array<Grocery>;

  constructor() {
    this.groceries = [];
  }

  get() {
    return this.groceries;
  }

  add(name) {
    this.groceries.unshift(new Grocery(name));
  }
}
Next, replace the contents of app.component.ts with the code below:
import { Component, OnInit } from "@angular/core";
import { GroceryService } from "./grocery.service";
import { Grocery } from "./grocery";

@Component({
  selector: "my-app",
  templateUrl: "app.component.html",
  providers: [GroceryService]
})
export class AppComponent {
  grocery: String;
  groceries: Array<Grocery>;

  constructor(private groceryService: GroceryService) {}

  ngOnInit() {
    this.groceries = this.groceryService.get();
  }

  add() {
    this.groceryService.add(this.grocery);
    this.grocery = "";
  }
}
Test your changes by adding a few items to the list.
You now have a very basic list, but there’s a big problem: this list isn’t persisted. Let’s look at how to change that.
Exercise: Persisting data
Start by adding the import below to the top of your grocery.service.ts file:
import { getString, setString } from "application-settings";
Next, in the same file, replace the existing add() function with the code below, which saves the grocery list using the application settings module you just imported.
add(name) {
  this.groceries.unshift(new Grocery(name));
  let names = this.groceries.map((item: Grocery) => {
    return item.name;
  });
  setString("groceries", names.toString());
}
Your data is now being saved, but it’s up to you to determine how to load this data when the application loads. A challenge!
Challenge: Loading saved data
Your challenge is to change grocery.service.ts to automatically load any data previously stored by the user. As a tip, you’ll want to use the getString() method you imported in the previous exercise.
NOTE: A convenient way to restart the app is to add or remove a new line from the TypeScript file you’re currently working on.
Replace the constructor in grocery.service.ts with the code below:
constructor() {
  this.groceries = [];
  let savedGroceriesString = getString("groceries");
  if (savedGroceriesString) {
    savedGroceriesString.split(",").forEach((grocery) => {
      this.groceries.push(new Grocery(grocery));
    });
  }
}
There are many ways to store data in NativeScript apps. In addition to using the application settings module, you may wish to use one of the options listed below.
Reference:
- NativeScript Firebase plugin
- NativeScript Couchbase plugin
- NativeScript SQLLite plugin
- Accessing RESTful HTTP APIs
Setting up routing and navigation
Routing in a NativeScript app with Angular 2 works very similarly to how it works on the web. In order to get things up and running we have to create a few files.
Exercise: Set up the routing infrastructure
- Create a new
groceriesfolder in your app. - Move the
grocery.tsandgrocery.service.tsfiles into the newgroceriesfolder. - Create new files named
groceries.component.htmlandgroceries.component.tswithin thegroceriesfolder. - Create a file named
app.routing.tsin your rootappfolder.
You should now have a folder structure that looks like this.
app
├── app.component.ts
├── app.css
├── app.routing.ts
├── groceries
│   ├── groceries.component.html
│   ├── groceries.component.ts
│   ├── grocery.service.ts
│   └── grocery.ts
├── main.ts
└── package.json
Next, update your groceries.component.ts file to use the code below:
import { Component, OnInit } from "@angular/core";
import { RouterExtensions } from "nativescript-angular/router";

import { GroceryService } from "./grocery.service";
import { Grocery } from "./grocery";

@Component({
  selector: "my-app",
  templateUrl: "groceries/groceries.component.html",
  providers: [GroceryService]
})
export class GroceriesComponent {
  grocery: String;
  groceries: Array<Grocery>;

  constructor(private groceryService: GroceryService, private routerExtensions: RouterExtensions) {}

  ngOnInit() {
    this.groceries = this.groceryService.get();
  }

  add() {
    this.groceryService.add(this.grocery);
    this.grocery = "";
  }
}
After that, copy and paste the contents of app.component.html into groceries.component.html, and delete the app.component.html file.
Finally, update the following three files as follows.
app.routing.ts:
import { Routes } from "@angular/router";

import { GroceriesComponent } from "./groceries/groceries.component";

export const appRoutes: Routes = [
  { path: "", component: GroceriesComponent }
];
app.component.ts:
import { Component } from "@angular/core";

@Component({
  selector: "main",
  template: "<page-router-outlet></page-router-outlet>"
})
export class AppComponent { }
main.ts:
import { platformNativeScriptDynamic, NativeScriptModule } from "nativescript-angular/platform";
import { NativeScriptFormsModule } from "nativescript-angular/forms";
import { NativeScriptRouterModule } from "nativescript-angular/router";
import { NgModule } from "@angular/core";

import { appRoutes } from "./app.routing";
import { AppComponent } from "./app.component";
import { GroceriesComponent } from "./groceries/groceries.component";

@NgModule({
  declarations: [
    AppComponent,
    GroceriesComponent
  ],
  bootstrap: [AppComponent],
  imports: [
    NativeScriptModule,
    NativeScriptFormsModule,
    NativeScriptRouterModule,
    NativeScriptRouterModule.forRoot(appRoutes)
  ]
})
class AppComponentModule {}

platformNativeScriptDynamic().bootstrapModule(AppComponentModule);
With that your app hasn’t changed, but you’ve moved files around so that you’re setup to add additional routes. Let’s do that!
Exercise: Scaffold out a new route
Create a new about folder within the app folder, and add two files named about.component.html and about.component.ts.
app
├── about
│   ├── about.component.html
│   └── about.component.ts
├── groceries
│   └── ...
└── ...
Paste the following code in for about.component.html:
<ActionBar title="About"></ActionBar>

<StackLayout>
  <Label height="100" text="Groceries is a simple grocery management app." textWrap="true"></Label>
</StackLayout>
And the following code to your about.component.ts file:
import { Component, OnInit } from "@angular/core";

@Component({
  selector: "my-app",
  templateUrl: "about/about.component.html"
})
export class AboutComponent {}
Next, open groceries.component.html back up and add the following code to the very top of the file:
<ActionBar title="Groceries">
  <ActionItem text="About" (tap)="navigate()"></ActionItem>
</ActionBar>
After that, open groceries.component.ts and add the method below to the GroceriesComponent class:
navigate() {
  this.routerExtensions.navigate(["/about"]);
}
After that, add AboutComponent to the list of declarations in the NgModule in main.ts. The full file should now look like this:
import { platformNativeScriptDynamic, NativeScriptModule } from "nativescript-angular/platform";
import { NativeScriptFormsModule } from "nativescript-angular/forms";
import { NativeScriptRouterModule } from "nativescript-angular/router";
import { NgModule } from "@angular/core";

import { appRoutes } from "./app.routing";
import { AppComponent } from "./app.component";
import { GroceriesComponent } from "./groceries/groceries.component";
import { AboutComponent } from "./about/about.component";

@NgModule({
  declarations: [
    AppComponent,
    GroceriesComponent,
    AboutComponent
  ],
  bootstrap: [AppComponent],
  imports: [
    NativeScriptModule,
    NativeScriptFormsModule,
    NativeScriptRouterModule,
    NativeScriptRouterModule.forRoot(appRoutes)
  ]
})
class AppComponentModule {}

platformNativeScriptDynamic().bootstrapModule(AppComponentModule);
And finally, replace the contents of app.routing.ts with the code below, which registers the new about route.
import { Routes } from "@angular/router";

import { GroceriesComponent } from "./groceries/groceries.component";
import { AboutComponent } from "./about/about.component";

export const appRoutes: Routes = [
  { path: "", component: GroceriesComponent },
  { path: "about", component: AboutComponent }
];
At this point you now have two routes, but let’s try tweaking how the routing works with a challenge.
Challenge: Configure routing
You have two tasks in this challenge: first you must make the navigation from the main component to the about component perform a flip animation, and second you must make the “About” button appear on the right-hand side of the ActionBar on iOS. (If you’re only setup to run Android, work with someone nearby on iOS for this one.)
Here are some documentation pages you can refer to for help:
Change the navigate() method in groceries.component.ts to use the code below:
navigate() {
  this.routerExtensions.navigate(["/about"], {
    transition: {
      name: "flip"
    }
  });
}
Change the ActionItem in groceries.component.html to have a new ios.position attribute:
<ActionItem text="About" (tap)="navigate()" ios.position="right"></ActionItem>
With routing out of the way, let’s now look at what is perhaps NativeScript’s coolest feature: the ability to access native iOS and Android APIs.
Adding additional Angular functionality
Now that you have a bit of Angular experience let’s try adding a few additional features to this groceries app. This section will be a super special ALL CHALLENGES SECTION—meaning, we’re going to suggest some new functionality for the application, and leave it up to you to do the implementations. No worries though, we’ll provide tips to point you in the right direction, as well as the solutions if you’d like to cheat 😀
Challenge: Add delete functionality
A grocery list is kind of useless if you can’t delete from the list, and your challenge is to implement a UI that allows users to do that. There are many ways you can choose to implement a UI like this. One potential option is laid out in the Solution below, however, you’re free to take any approach you’d like.
First, update the <template> in groceries.component.html to use the code below:
<template let-item="item">
  <GridLayout columns="*, auto">
    <Label col="0" [text]="item.name"></Label>
    <Label col="1" (tap)="delete(item)" text="Delete" color="red"></Label>
  </GridLayout>
</template>
Next, add the following function to the GroceriesComponent class in groceries.component.ts:
delete(grocery: Grocery) {
  this.groceryService.delete(grocery);
}
Finally, replace the groceries.service.ts file with the code below, which adds a new delete() method, as well as a minor refactor to save changes on additions and deletions.
import { Injectable } from "@angular/core";
import { getString, setString } from "application-settings";

import { Grocery } from "./grocery";

@Injectable()
export class GroceryService {
  private groceries: Array<Grocery>;

  constructor() {
    this.groceries = [];
    let savedGroceriesString = getString("groceries");
    if (savedGroceriesString) {
      savedGroceriesString.split(",").forEach((grocery) => {
        this.groceries.push(new Grocery(grocery));
      });
    }
  }

  get() {
    return this.groceries;
  }

  add(name) {
    this.groceries.unshift(new Grocery(name));
    this.save();
  }

  delete(grocery: Grocery) {
    let index = -1;
    this.groceries.forEach((item: Grocery, i) => {
      if (item === grocery) {
        index = i;
      }
    });
    this.groceries.splice(index, 1);
    this.save();
  }

  private save() {
    let names = this.groceries.map((item: Grocery) => {
      return item.name;
    });
    setString("groceries", names.toString());
  }
}
With the ability to delete groceries implemented, let’s try one additional challenge.
Challenge: Add groceries on “Enter” presses
Currently you can add groceries by tapping on the “Add” button. But it would be nice if you could also add by pressing the DONE button (or Enter/Return when in a simulator). As a hint, try searching for “return” on the TextField’s API documentation.
Change the <TextField> in groceries.component.html to use the code below, which adds a new returnKeyType property and returnPress event handler.
<TextField col="0" hint="Enter a grocery" [(ngModel)]="grocery" returnKeyType="done" (returnPress)="add()"></TextField>
And that’s it. It’s time for lunch, and then back to more NativeScript and Angular 2!
Extensibility and plugins
In this workshop you will learn how to create your own UI components and also how to create plugins which will use native iOS and Android functionality.
Your first UI Custom UI Component
Start by creating a new ng project.
tns create WorkshopFive --ng
cd WorkshopFive
We will start be creating a hello world type component first, then add it to the app.component.
Exercise: Set up the first component
First create a new file called fun-label.ts in your app folder and add the following code.
import { Component } from "@angular/core";

@Component({
    selector: "FunLabel",
    template: `
    <Label text="FunLabel">
    </Label>
    `
})
export class FunLabel {

}
This component is a simple @Component that contains NativeScript label saying "FunLabel".
Now let's add FunLabel to app.component.html. Add the following line below the label:
<FunLabel> </FunLabel>
But that is not enough to make it work just yet.
The final step is to add the FunLabel declaration to the @NgModule in main.ts
First add this import line to the rest of the imports.
import { FunLabel } from "./fun-label";
and now add FunLabel to declarations
declarations: [AppComponent, FunLabel],
import { platformNativeScriptDynamic, NativeScriptModule } from "nativescript-angular/platform";
import { NgModule } from "@angular/core";
import { AppComponent } from "./app.component";
import { FunLabel } from "./fun-label";

@NgModule({
    declarations: [AppComponent, FunLabel],
    bootstrap: [AppComponent],
    imports: [NativeScriptModule],
})
class AppComponentModule {}

platformNativeScriptDynamic().bootstrapModule(AppComponentModule);
Now build the app and you should see the nice and shiny FunLabel.
The next step is to add binding property to our FunLabel.
Exercise: Property Binding
Open fun-label.ts
We will call the new property line and bind it to the text of the underlying <Label>.
This can be accomplished in three steps.
1) Add Input to the imports
import { Component, Input } from "@angular/core
2) Change the text="FunLabel" to
<Label
    [text]="line">
</Label>
3) Add @Input property inside the FunLabel class.
You can read more about
@Inputs properties in the Angular docs
export class FunLabel {
    @Input() public line: string = "";
}
This is how the fun-label.ts should look now.
import { Component, Input } from "@angular/core";

@Component({
    selector: "FunLabel",
    template: `
    <Label
        [text]="line">
    </Label>
    `
})
export class FunLabel {
    @Input() public line: string = "";
}
To test it out, update the FunLabel in app.component.html to the below code and run the app.
    <FunLabel
        [line]="message"
        class="message">
    </FunLabel>
Now let's make the FunLabel a bit fun and add some animations.
Exercise: Add animations
To perform animations we need to get hold of the Label object first.
We will do it in few steps:
1) Add the required imports for ViewChild, ElementRef and View.
import { Component, Input, ViewChild, ElementRef } from "@angular/core";
import { View } from "ui/core/view";
2) Add a variable #myLabel definion to the label and call animate on tap
<Label #myLabel
    [text]="line"
    (tap)="animate()">
</Label>
3) Add the label reference to the call
export class FunLabel {
    @Input() public line: string = "";
    @ViewChild("myLabel") labelRef: ElementRef;
}
4) Next we can create a getter that will return the NativeScript label object
export class FunLabel {
    @Input() public line: string = "";
    @ViewChild("myLabel") labelRef: ElementRef;

    private get view() : View {
        return <View>this.labelRef.nativeElement;
    }
}
5) Finally we need the function to animate.
Add the following code to the FunLabel class
private animate() {
    this.zoom();
}

public zoom() {
    this.view.animate({ scale: { x: 0.5, y: 0.5 }  })
        .then(() =>
            this.view.animate({ scale: { x: 2, y: 2 }  })
        )
        .then(() =>
            this.view.animate({ scale: { x: 0, y: 0 }  })
        )
        .then(() =>
            this.view.animate({ scale: { x: 1, y: 1 }, duration: 2000  })
        )
}
This is how fun-label.ts should look at this point.
import { Component, Input, ViewChild, ElementRef } from "@angular/core";
import { View } from "ui/core/view";

@Component({
    selector: "FunLabel",
    template: `
    <Label #myLabel
        [text]="line"
        (tap)="animate()">
    </Label>
    `
})
export class FunLabel {
    @Input() public line: string = "";
    @ViewChild("myLabel") labelRef: ElementRef;

    private get view() : View {
        return <View>this.labelRef.nativeElement;
    }

    private animate() {
        this.zoom();
    }

    public zoom() {
        this.view.animate({ scale: { x: 0.5, y: 0.5 }  })
            .then(() =>
                this.view.animate({ scale: { x: 2, y: 2 }  })
            )
            .then(() =>
                this.view.animate({ scale: { x: 0, y: 0 }  })
            )
            .then(() =>
                this.view.animate({ scale: { x: 1, y: 1 }, duration: 2000  })
            )
    }
}
Bonus Exercise: Add animationType property
Using the below animation functions, add animationType @Input property.
Now the animate function should play one of the below functions.
public zoom() {
    this.view.animate({ scale: { x: 0.5, y: 0.5 }  })
        .then(() =>
            this.view.animate({ scale: { x: 2, y: 2 }  })
        )
        .then(() =>
            this.view.animate({ scale: { x: 0, y: 0 }  })
        )
        .then(() =>
            this.view.animate({ scale: { x: 1, y: 1 }, duration: 2000  })
        )
}

public spin() {
    this.view.animate({ rotate: 1080, duration: 750 })
        .then(() =>
            this.view.animate({ rotate: 0, duration: 750 } )
        )
}

public move() {
    this.view.animate({ translate: { x: 100, y: 0 }  })
        .then(() =>
            this.view.animate({ translate: { x: 100, y: 100 }  })
        )
        .then(() =>
            this.view.animate({ translate: { x: 0, y: 100 }  })
        )
        .then(() =>
            this.view.animate({ translate: { x: 0, y: 0 }  })
        )
}
public fade() {
    this.view.animate({ opacity: 0  })
        .then(() =>
            this.view.animate({ opacity: 1  })
        )
}
This is how the property should be set in app.component.html:
<FunLabel
    [line]="message"
    class="message"
    animationType="fade">
</FunLabel>
Here is the full solution:
import { Component, Input, ViewChild, ElementRef } from "@angular/core";
import { View } from "ui/core/view";

@Component({
    selector: "FunLabel",
    template: `
    <Label #myLabel
        [text]="line"
        (tap)="animate()">
    </Label>
    `
})
export class FunLabel {
    @Input() public line: string = "";
    @ViewChild("myLabel") labelRef: ElementRef;
    @Input() public animationType: string = "fade";

    private get view() : View {
        return <View>this.labelRef.nativeElement;
    }

    private animate() {
        switch(this.animationType.toLowerCase()) {
            case "spin":
                this.spin();
                break;
            case "zoom":
                this.zoom();
                break;
            case "move":
                this.move();
                break;
            case "fade":
                this.fade();
                break;
            default:
                this.spin();
        }
    }

    public zoom() {
        this.view.animate({ scale: { x: 0.5, y: 0.5 }  })
            .then(() =>
                this.view.animate({ scale: { x: 2, y: 2 }  })
            )
            .then(() =>
                this.view.animate({ scale: { x: 0, y: 0 }  })
            )
            .then(() =>
                this.view.animate({ scale: { x: 1, y: 1 }, duration: 2000  })
            )
    }

    public spin() {
        this.view.animate({ rotate: 1080, duration: 750 })
            .then(() =>
                this.view.animate({ rotate: 0, duration: 750 } )
            )
    }

    public move() {
        this.view.animate({ translate: { x: 100, y: 0 }  })
            .then(() =>
                this.view.animate({ translate: { x: 100, y: 100 }  })
            )
            .then(() =>
                this.view.animate({ translate: { x: 0, y: 100 }  })
            )
            .then(() =>
                this.view.animate({ translate: { x: 0, y: 0 }  })
            )
    }
    public fade() {
        this.view.animate({ opacity: 0  })
            .then(() =>
                this.view.animate({ opacity: 1  })
            )
    }
}
The final part of creating the FunLabel is to raise an event every time the animation is finished.
Exercise: Adding event handlers
1) Let's start with the usual of adding new imports Output and EventEmitter
import { Component, Input, ViewChild, ElementRef, Output, EventEmitter } from "@angular/core";
2) Now we need to add @Output event property.
When defining an Output property, you can give it a prop-name (this is how it will referenced in the parent component) and return-type (this is the type that is expected to be returned)
@Output public prop-name: EventEmitter<return-type> = new EventEmitter<return-type>();
Add the following @Output property below all the @Input properties—the order is not really important.
@Output() public animateFinished: EventEmitter<number> = new EventEmitter<number>();
3) In order to raise the event we just need to call eventname.next(param).
For this exercise we will add a counter property and return a new value each time an animation is complete.
Then we will wrap it nicely in an emitAnimateFinished() function:
private counter: number = 0;
private emitAnimateFinished() {
    this.counter++;
    this.animateFinished.next(this.counter);
}
4) Now the only thing that we have left is to call this.emitAnimateFinished() each time the animation() function is complete.
Here is how to do it for spin()
And your task is to do the same for the rest of them (zoom, move and fade).
public spin() {
    this.view.animate({ rotate: 1080, duration: 750 })
        .then(() =>
            this.view.animate({ rotate: 0, duration: 750 } )
        )
        .then(() =>
            this.emitAnimateFinished()
        )
}
The FunLabel class should look like this:
import { Component, Input, ViewChild, ElementRef, Output, EventEmitter } from "@angular/core";
import { View } from "ui/core/view";

@Component({
    selector: "FunLabel",
    template: `
    <Label #myLabel
        [text]="line"
        (tap)="animate()">
    </Label>
    `
})
export class FunLabel {
    @Input() public line: string = "";
    @ViewChild("myLabel") labelRef: ElementRef;
    @Input() public animationType: string = "fade";
    @Output() public animateFinished: EventEmitter<number> = new EventEmitter<number>();

    private get view() : View {
        return <View>this.labelRef.nativeElement;
    }

    private counter: number = 0;
    private emitAnimateFinished() {
        this.counter++;
        this.animateFinished.next(this.counter);
    }

    private animate() {
        switch(this.animationType.toLowerCase()) {
            case "spin":
                this.spin();
                break;
            case "zoom":
                this.zoom();
                break;
            case "move":
                this.move();
                break;
            case "fade":
                this.fade();
                break;
            default:
                this.spin();
        }
    }


    public spin() {
        this.view.animate({ rotate: 1080, duration: 750 })
            .then(() =>
                this.view.animate({ rotate: 0, duration: 750 } )
            )
            .then(() =>
                this.emitAnimateFinished()
            )
    }

    public move() {
        this.view.animate({ translate: { x: 100, y: 0 }  })
            .then(() =>
                this.view.animate({ translate: { x: 100, y: 100 }  })
            )
            .then(() =>
                this.view.animate({ translate: { x: 0, y: 100 }  })
            )
            .then(() =>
                this.view.animate({ translate: { x: 0, y: 0 }  })
            )
            .then(() =>
                this.emitAnimateFinished()
            )
    }

    public zoom() {
        this.view.animate({ scale: { x: 0.5, y: 0.5 }  })
            .then(() =>
                this.view.animate({ scale: { x: 2, y: 2 }  })
            )
            .then(() =>
                this.view.animate({ scale: { x: 0, y: 0 }  })
            )
            .then(() =>
                this.view.animate({ scale: { x: 1, y: 1 }, duration: 2000  })
            )
            .then(() =>
                this.emitAnimateFinished()
            )
    }
    public fade() {
        this.view.animate({ opacity: 0  })
            .then(() =>
                this.view.animate({ opacity: 1  })
            )
            .then(() =>
                this.emitAnimateFinished()
            )
    }
}
To put the new event property to test we need to:
a) add an onFinished(val) function to AppComponent in app.component.ts
    public onFinished(val: boolean) {
        alert("Finished Animation:" + val);
    }
b) add animateFinished handler to FunLabel in app.compnent.html
Notice the $event attribute passed in as the parameter. This is how you pass the value returned by the component.
    <FunLabel
        [line]="message"
        class="message"
        animationType="fade"
        (animateFinished)="onFinished($event)">
    </FunLabel>
Now run the app. Each time an animation is complete you should get a nice popup with a counter.
NativeScript UI components can respond to other events like Double Tap, Long Press, Swipe, Pan, Pinch, Rotation, Touch
Bonus Exercise: Animate on swipe
Read in the documenation how Swipe works and implement different animation for swipe left, right, up and down.
Here is the full solution. Have fun.
import { Component, Input, ViewChild, ElementRef, Output, EventEmitter } from "@angular/core";
import { View } from "ui/core/view";
import { SwipeGestureEventData } from "ui/gestures";

@Component({
    selector: "FunLabel",
    template: `
    <Label #myLabel
        [text]="line"
        (tap)="animate()"
        (swipe)="onSwipe($event)">
    </Label>
    `
})
export class FunLabel {
    @Input() public line: string = "";
    @ViewChild("myLabel") labelRef: ElementRef;
    @Input() public animationType: string = "fade";
    @Output() public animateFinished: EventEmitter<number> = new EventEmitter<number>();

    private get view() : View {
        return <View>this.labelRef.nativeElement;
    }

    private counter: number = 0;
    private emitAnimateFinished() {
        this.counter++;
        this.animateFinished.next(this.counter);
    }

    private animate() {
        switch(this.animationType.toLowerCase()) {
            case "spin":
                this.spin();
                break;
            case "zoom":
                this.zoom();
                break;
            case "move":
                this.move();
                break;
            case "fade":
                this.fade();
                break;
            default:
                this.spin();
        }
    }


    public spin() {
        this.view.animate({ rotate: 1080, duration: 750 })
            .then(() =>
                this.view.animate({ rotate: 0, duration: 750 } )
            )
            .then(() =>
                this.emitAnimateFinished()
            )
    }

    public move() {
        this.view.animate({ translate: { x: 100, y: 0 }  })
            .then(() =>
                this.view.animate({ translate: { x: 100, y: 100 }  })
            )
            .then(() =>
                this.view.animate({ translate: { x: 0, y: 100 }  })
            )
            .then(() =>
                this.view.animate({ translate: { x: 0, y: 0 }  })
            )
            .then(() =>
                this.emitAnimateFinished()
            )
    }

    public zoom() {
        this.view.animate({ scale: { x: 0.5, y: 0.5 }  })
            .then(() =>
                this.view.animate({ scale: { x: 2, y: 2 }  })
            )
            .then(() =>
                this.view.animate({ scale: { x: 0, y: 0 }  })
            )
            .then(() =>
                this.view.animate({ scale: { x: 1, y: 1 }, duration: 2000  })
            )
            .then(() =>
                this.emitAnimateFinished()
            )
    }
    public fade() {
        this.view.animate({ opacity: 0  })
            .then(() =>
                this.view.animate({ opacity: 1  })
            )
            .then(() =>
                this.emitAnimateFinished()
            )
    }

    private onSwipe(args: SwipeGestureEventData) {
        switch(args.direction) {
            case 1: //Right
                this.view.animate({ translate: { x: 100, y: 0 }, rotate: 90  })
                .then(() =>
                    this.view.animate({ translate: { x: 0, y: 0 }, rotate: 0  })
                )
                break;
            case 2: //Left
                this.view.animate({ translate: { x: -100, y: 0 }, rotate: -90  })
                .then(() =>
                    this.view.animate({ translate: { x: 0, y: 0 }, rotate: 0  })
                )
                break;
            case 4: //Up
                this.view.animate({ translate: { x: 0, y: -100 }, scale: { x: 1, y: 3}  })
                .then(() =>
                    this.view.animate({ translate: { x: 0, y: 0 }, scale: { x: 1, y: 1}   })
                )
                break;
            case 8: //Down
                this.view.animate({ translate: { x: 0, y: 100 }, scale: { x: 1, y: -1}   })
                .then(() =>
                    this.view.animate({ translate: { x: 0, y: 0 }, scale: { x: 1, y: 1}   })
                )
                break;
        }
    }

}
Using npm modules
Now that we know how to create our own components, let's learn how to one created by someone else. In this exercise you will learn how to add an npm module to the project to get access to additional functionality.
But how do you go about finding one that could work for you? You can go to:
- NativeScript Plugins page, which contains a set of plugins that have been verified by Telerik.
npmjsand search fornativescript, which contains a much bigger list of community-written plugins for NativeScript.
Let's learn how to add an npm module.
Exercise: Installing a NativeScript plugin from npm
The usual way to add an npm module would be to call npm i module-name, however when it comes to installing NativeScript-specific plugins it is better to call tns plugin add module-name. That is because tns plugin add will do all that npm install does plus it configures any native dependencies that the plugin may need to use. This might include installing additional native iOS and/or components.
Let's add the appinfo plugin, which will allow us to get info like the version name, build number and app ID.
Run the following CLI command:
tns plugin add nativescript-appinfo
Once you run this command you should be able to see the nativescript-appinfo module inside the node_modules folder and also the dependency to the module should be added to the package.json at the root of the project (not the one in the app folder)
Now let's try to use the nativescript-appinfo module.
Open app.component.ts and add the following line to the top of the file (or anywhere before @Component starts):
var appinfo = require("nativescript-appinfo");
This will give us access to the appinfo module in this area of code.
Now we can call the appinfo instance to get some app information. Add the following piece of code inside the onTap() function:
appinfo.getAppId()
    .then((id) => {
        alert("Your app's id is: " + id);
    });
Now build the app and see what happens when you tap the button.
As a bonus exercise: run this app in the debug mode and add a break point at getAppId() and try to step in to getAppId() function to see what happens.
There are also visual modules that you could use in your app.
Exercise: Use ColorPicker
For this exercise we will use ColorPicker, for more info go to npmjs.
First we need to import it nativescript-color-picker. To do so run the following command in the CLI:
tns plugin add nativescript-color-picker
Next open app.components.ts and add a couple of imports. One for the ColorPicker and the other for the Color component.
import { ColorPicker } from "nativescript-color-picker";
import { Color } from "color";
Then let's add few bits to the AppComponent class.
We need an instance of the ColorPicker and a selectedColor property.
private picker = new ColorPicker();
private selectedColor: Color = new Color("Red");
We also need a function that will show the ColorPicker and then passing the result to the selectedColor.
public showColorPicker() {
    this.picker.show('#3489db', 'ARGB')
        .then( (result: number) => {
            this.selectedColor = new Color(result);
        });
}
Finally add a Button to app.component.html, which will call showColorPicker() and also with a backgroundColor bound to selectedColor.
<Button
    text="ColorPicker Demo"
    (tap)="showColorPicker()"
    [backgroundColor]="selectedColor">
</Button>
Now build the app and enjoy the new plugin.
The final exercise is to use a UI Component which can be added in html by using its tag.
Exercise: Use DropDown
For this exercise we will use nativescript-drop-down. Let's add the plugin by calling
tns plugin add nativescript-drop-down
Now in order to make the UI Compoent available in html we need to register it as an element.
This needs to be done in main.ts. We need to import registerElement function and then register the UI component we need.
The first parameter we pass in is the name we want to use for the component, in this case let's use NSDropDown.
The second parameter we pass is a callback that requires the UI component we want to use.
import { registerElement } from "nativescript-angular/element-registry";
registerElement("NSDropDown", () => require("nativescript-drop-down/drop-down").DropDown);
Next let's add the necessary bits to app.component.ts
public fruits: Array<string> = [
    "apple", "banana", "coconut", "date", "elderberry"
];

public selectedFruitIndex = 0;
public get selectedFruit() {
    return this.fruits[this.selectedFruitIndex];
}

public itemChanged(selectedIndex){
    this.selectedFruitIndex = selectedIndex;
}
And now we can use the new component in app.component.html. Notice how we use NSDropDown, as it is defined in main.ts.
<Label [text]="selectedFruit"></Label>
<NSDropDown #fruitDropDown
    backroundColor="red"
    [items]="fruits"
    (selectedIndexChange)="itemChanged(fruitDropDown.selectedIndex)">
</NSDropDown>
Now build the app and enjoy.
Managing platforms and node_modules
When you clone an existing NativeScript app from GitHub, the project will already contain a list of required npm modules (which you can view the package.json file) together with selected platforms (Android and/or iOS) it is designed to work for.
These will get automatically downloaded when you build the project, however until the modules get loaded TypeScript won't be able to provide you with the support for these modules.
The best thing to do at this stage is to call:
tns install
Which will download and configure all the required modules and platforms.
Changing npm module version
When you want to change the version of an npm module, just find it in package.json change the version to the one you need, then delete it from the node_modules folder and finally run tns install.
Trouble shooting new npm installs not working as expected.
Sometimes freshly installed modules with native dependencies don't seem to work. This usually happens when you built your app once already. Then you add a new npm module (which requires native Android or iOS support). And you are trying to use the module and run the app again.
The best thing to do is to either delete the platforms folder and rerun the build or you could use the CLI to help you with the task by calling tns platform add and then remove.
Just like this:
For Android:
tns platform remove android
tns platform add android
For iOS:
tns platform remove ios
tns platform add ios
Creating a component with two-way binding
The final task will be to create a custom component with a two-way binding. How many times do you get tired of creating a Label and a TextField to capture data? How about we create a component that will contain both a Label and a TextField in one go.
Let's first scaffold the component.
Exercise: Scaffold LabelTextField.
Create a new file called label-text-field.ts and add the following code. By now this code should be self explanatory.
import { Component, Input } from "@angular/core";

@Component({
    selector: "LabelTxt",
    template: `
    <StackLayout orientation="horizontal">
        <Label
            [text]="label"
            width="30%">
        </Label>
        <TextField #tf
            [text]="text"
            width="60%"></TextField>
    </StackLayout>
    `
})
export class LabelTextField {
    @Input() public label: string;
    @Input() public text: string;
}
Now let's register the component in main.ts.
First we need to import the new component.
Since LabelTextField is meant to provide two-way binding we also need to import NativeScriptFormsModule.
import { LabelTextField } from "./label-text-field";
import { NativeScriptFormsModule } from "nativescript-angular/forms";
Next we need to add LabelTextField to declarations and NativeScriptFormsModule to imports.
Replace the current @NgModule with:
@NgModule({
    declarations: [AppComponent, FunLabel, LabelTextField],
    bootstrap: [AppComponent],
    imports: [NativeScriptModule, NativeScriptFormsModule],
})
Finally let's add the few LabelTextFields to the UI.
Add a couple of properties to the AppComponent class in app.component.ts:
public name: string = "annonymous";
public telephone: string ="0123456789";
Open app.components.html and add the following code.
Note that our compenent uses LabelTxt tag.
<LabelTxt
    label="Name"
    [text]="name">
</LabelTxt>
<LabelTxt
    label="Telephone"
    [text]="telephone">
</LabelTxt>

<FunLabel
    [line]="name">
</FunLabel>
<FunLabel
    [line]="telephone">
</FunLabel>
Build the app and you should be able to see a bunch of Labels with TextFields next to them, together with the FunLabels, which display the same value. However if you edit any of the TextFields the FunLabels won't get updated.
Now let's add two way binding on TextField.text property to LabelTextField.
Add the end of this exercise you will be able to use LabelTextField with [(ngModel)].
Exercise: Implement ControlValueAccessor
Open label-text-field.ts.
Let's start with adding the necessary imports.
import { Component, Input, Inject, Optional } from '@angular/core';
import { NgControl, ControlValueAccessor } from '@angular/forms';
Next we need to extend LabelTextField class so that it implements ControlValueAccessor.
export class LabelTextField implements ControlValueAccessor {
At this point Visual Studio Code will complain that
writeValue(it is called when the bound property is changed outside of this component),registerOnChange(it is called at the beginning to provide an onChange function) andregisterOnTouched(it is called at the beginning to provide onTouched function) functions are missing. Also in order to useLabelTextFieldwith[(ngModel)]we need to set up a value accessor in the constructor.
Update LabelTextField class to:
export class LabelTextField implements ControlValueAccessor {
    private _changeFn: any;

    @Input() public label: string;
    @Input() public text: string;

    constructor(@Inject(NgControl) @Optional() ngc: NgControl) {
        if (ngc) {
            ngc.valueAccessor = this;
        }
    }

    // Write a new value to the element.
    writeValue(obj: any): void {
        this.text = obj;
    }

    // Set the function to be called when the control receives a change event.
    registerOnChange(fn: any): void {
        this._changeFn = fn;
    }

    // Set the function to be called when the control receives a touch event.
    registerOnTouched(fn: any): void {
    }
}
At this point you should be able to update LabelText components in html to use [(ngModel)] instead of [text], but still editing the TextField won't update the bound properties.
That is because we need to add change detection to the TextField -> Text.
We will do it in two steps.
1) Add the following function to LabelTextField class, which will call _changeFn (ngModel's onChanged function provided through registerOnChange ).
updateTextProperty(newText) {
    if (this._changeFn) {
        if (this.text + "" !== newText + "") {
            this._changeFn(newText);
        }
    }
}
2) Add textChange handler to TextField in the template, so that every time the user types something in the TextField this will call updateTextProperty and ultimately update ngModel.
<TextField #tf
    [text]="text"
    (textChange)="updateTextProperty(tf.text)"
    width="60%">
</TextField>
Now let's just update LabelTxt in app.component.html to use ngModel
<LabelTxt
    label="Name"
    [(ngModel)]="name">
</LabelTxt>
<LabelTxt
    label="Telephone"
    [(ngModel]="telephone">
</LabelTxt>
Build the app and enjoy.
Bonus Exercise: Derive TextField hint from label text property
TextField has a hint property, which provides a hint to the user as to what they could type. Which you can you like this:
<TextField #tf
    [text]="text"
    (textChange)="updateTextProperty(tf.text)"
    [hint]="label"
    width="60%">
</TextField>
Can you update LabelTextField so that it automatically takes value of label puts it to lower case and appends ... ?
For example if the label value is "Email" then the hint value should be email....
In order to solve this puzzle we need a property getter, which will return the transformed label value
public get simpleHint() {
    return this.label.toLowerCase() + "...";
}
And then bind hint of the TextField to simplehint
<TextField #tf
    [text]="text"
    (textChange)="updateTextProperty(tf.text)"
    [hint]="simplehint"
    width="60%">
</TextField>
Code sharing
The case for code sharing
If you have a use case that requires sharing code between a web site and a mobile app, have I got the tool for you! Introducing Nathan Walker's https://github.com/NathanWalker/angular2-seed-advanced project. This project is based on Minko Geshev's https://github.com/mgechev/angular2-seed project which allows you to quickly spin up a web site, but it takes this project vastly forward with the introduction of allowing code to be shared between web, desktop via Electron, and mobile via NativeScript. You can quickly spin up three apps in one fell swoop.
The Advanced Seed project also integrates i18n support for multilingual apps by leveraging ngTranslate, as well as analytics via Angulartics and a test harness so you can test your code...and more!
This technological advancement is brought to you by the advent of Angular 2, which decoupled the DOM so that we can start sharing large parts of our codebase for various platforms.
In this workshop, we're going to work with the http://pokeapi.co/ to populate a list on the web as well as iOS and Android.
Getting started with the Advanced-Angular2-Seed repo
Let's get up and running with the Advanced Seed. Please refer to the https://github.com/NathanWalker/angular2-seed-advanced to ensure that your environment is ready.
git clone --depth 1 https://github.com/NathanWalker/angular2-seed-advanced.git
cd angular2-seed-advanced
npm install
npm start
Start the mobile workflow
iOS:                      npm run start.ios
iOS (livesync emulator):  npm run start.livesync.ios
iOS (livesync device):    npm run start.livesync.ios.device

// or...using AVD or Genymotion Android emulator

Android:                      npm run start.android
Android (livesync emulator):  npm run start.livesync.android
Android (livesync device):    npm run start.livesync.android.device
You should have a web site and either an iOS or Android simulator running. You can also run two simulators at once if you like.
Note, on occasion your mobile livesyncing may fail when using this seed. On occasion, you may need to restart the process, so press Ctrl>C in your terminal and restart the
npm run start.livesync...routine.
Exploring the architecture
Open the root folder of your app in your IDE of choice. Let's take a look at all the moving parts. Navigate to the src/client folder.
app/frameworks: contains your shared application architecture code.
core: foundation layer (decorators and low-level services)analytics: analytics provided by Segmenti18n: internationalization featureselectron: Electron specific codetest: test specific code providing conveniences to make testing your code easier and faster
The code we will be editing in this workshop is:
sample: contains shared navigational components like navbar and toolbar andsample.module.tswhich is the app's 'switchboard'sample/services: contains services that can communicate with a backendapp/components: contains pages (home and about) and base app code
The NativeScript app is found in the nativescript folder. Make any mobile-specific edits in this folder, such as adding icons and splash screen images to your app/App_Resources folder.
- To edit both web and mobile apps, you can make changes to files in
src/clientornativescriptfolders. - A symbolic link exists between the web
src/clientand thenativescriptfolder so changes in either location are mirrored because they are the same directory inside.
Note: Normally when greenfielding a project using this seed, it's best for maintenance ease to create a fresh folder for your new app code in
src/client/app/frameworks- for example the PocketRave app is located insrc/client/app/frameworks/pocketrave- and then change any paths that point to theappfolder. This way, you can upgrade your project by checking out a new copy of the Advanced Seed and then dropping your app's folder into/frameworks. For this workshop, however, we will simply be editing files insrc/client/app/components. Reference PocketRave as an example of this type of setup. Visit http://PocketRave.me online for a full demo of this app.
Making a cross-platform edit
Let's change this app from being a shout-out to great scientists to being a celebration of Pokemon! Because we can!
Exercise: Edit the app's structure
Let's remove the language switcher component, which is a dropdown on the web and a segmented bar on mobile. Let's also edit the app's title.
First, let's make some edits on the web. Navigate in VSCode to src/client/app/frameworks/sample/components/. In this folder are stored the navigation type files (toolbar and navbar) for this app.
Open toolbar.component.html. The language-switcher is included here as <lang-switcher></lang-switcher>. Delete that line.
Change the <h1></h1> tag in this file for the web as well to "I love Pokemon!".
Your web app should refresh and you will see the site without the language switcher.
Second, let's make these same edits on mobile.
Now take a look at src/client/app/frameworks/sample/components/toolbar.component.tns.html - note it has intentionally been left blank.
Normally this type of file would have corresponding code to match web and mobile layouts. Note the naming conventions of these files. Anything with .tns. is destined to be used in a Telerik NativeScript app. For our case, however, we need to navigate to src/client/app/components/app.component.tns.html to remove the
In this file, change the title of the app in the <ActionBar> markup to be "I love Pokemon!".
Note how the app title is contained in an <h1> on web and an <ActionBar> on mobile. This illustrates the limited ability, currently, of the app to share every bit of code between web and mobile, as the layouting mechanism is very different on these two platforms. We will see tighter codesharing in a minute, however.
By removing the language switcher, we've broken the i18n translations, so let's delete everything in the body of the home page and rebuild it. Go to src/client/app/components/home and delete everything in home.component.tns.html and home.component.html.
The takeaway from this exercise is that you have full control over where your code goes, but there are some patterns that start to manifest themselves. Most importantly, note the naming conventions that allow you to separate your code per platform.
Adding a service
Let's add a service to consume data brought in from the PokeAPI. We're going to display a list of pokemon on all platforms.
Exercise: Add a service
Add a new file to src/client/app/frameworks/sample/services/ called pokemon.service.ts and paste in the following:
import { Injectable } from '@angular/core';
import { Http, Response } from '@angular/http';
import { LogService } from '../../core/services/log.service';
import { Observable } from 'rxjs/Rx';
import 'rxjs/add/operator/map';

@Injectable()
export class PokemonService {
    private requestURL: string;

    constructor(
        private logger: LogService,
        private http: Http) {
        logger.debug(`pokemon service initializing...`);
        this.requestURL = 'http://pokeapi.co/api/v2/pokemon';
    }

    public getPokemon(): Observable<any> {
        let pokemonURL = this.requestURL;
        return this.http.get(pokemonURL)
            .map((res) => {
                let pokemon = res.json();
                return pokemon.results || [];
            })
            .catch(this.handleError);
    }


    private handleError(error: Response) {
        return Observable.throw(error);
    }
}
Now, let's integrate this service into the app:
Navigate to src/client/app/frameowrks/sample/sample.module.ts to include service like this:
Paste this line under the multilingualReducer line:
import { PokemonService } from './services/pokemon.service';
and ensure that it's listed as a provider by adding it to the list of providers under NameListService:
providers: [
    NameListService,
    PokemonService
  ],
Add this service into the index.ts list of available services by adding this export to the bottom of src/client/app/frameworks/sample/index.ts:
export * from './services/pokemon.service';
Finally, you need to import this service into your frontend files, so that your home pages can leverage it. Navigate to src/client/app/components/home/home.component.ts and replace the content of this file with this:
// libs
import { BehaviorSubject } from 'rxjs/BehaviorSubject';
import { OnInit } from '@angular/core';

// app
import { BaseComponent } from '../../frameworks/core/index';
import { PokemonService } from '../../frameworks/sample/index';

@BaseComponent({
  moduleId: module.id,
  selector: 'sd-home',
  templateUrl: 'home.component.html',
  styleUrls: ['home.component.css']
})
export class HomeComponent implements OnInit {

  public pokemon$: BehaviorSubject<Array<any>> = new BehaviorSubject([]);

  constructor(
    public pokemonService: PokemonService
    ) {}

  ngOnInit() {
    this.pokemonService.getPokemon()
      .subscribe((pokemon: Array<any>) => {
          this.pokemon$.next(pokemon);
      });
  }
}
You now have a service that returns an array via an http call to the PokeAPI. Notice, you only have one service and it's sent to the frontend in one call. Now, you can display the data as you like, using web and mobile layouts!
Rebuilding the home screen
We are going to show a list of Pokemon, as returned by the service, on both web and mobile screens. On mobile, we will simply display a ListView, and on the web, we will show a simple set of <p> tags.
Exercise: Edit the frontend
Delete everything in src/client/app/components/home/home.component.tns.html and paste in the following code to add a ListView for the mobile app:
<StackLayout class="container-content">
    <GridLayout columns="*" rows="*">
        <ListView [items]="pokemon$ | async" row="1" height="300">
            <template let-item="item">
                <StackLayout>
                    <Label [text]="item.name"></Label>
                </StackLayout>
            </template>
        </ListView>
    </GridLayout>
</StackLayout>
Then, replace the code in src/client/app/components/home/home.component.html with the code below to create a simple list on native:
<ul *ngFor="let pokemon of pokemon$ | async">
    <li>{{ pokemon.name }}</li>
</ul>
With just a few lines of code, you've built a cross-platform presentation screen to show a list of Pokemon!
SUPER CHALLENGE!: Make this app into a master-detail screen. You will need to use the url that this API passes to you, pass it through a (tap) function on the front end, and switch the screen to display the detail of the Pokemon, which will require another API call. Good luck! Take a look at PracticeBuddy for tips.
Customize the CSS by platform
You can truly fine-tune the look of your web and native mobile app by isolating certain elements of the CSS associated to each file, simply by paying attention to the the names of the files.
In the src/client/app/components/home folder, note the naming convention of the css files. CSS for the web for the home page, for example, is handled by home.component.css and CSS for mobile is handled by home.component.tns.css.
Exercise: Tweak the CSS
The listview looks a little crunched on mobile, so edit the src/client/app/components/home/home.comonent.tns.css:
.list-item {
  padding: 10;
  margin: 10;
}
CHALLENGE!: Do some more CSS tweaks to personalize your apps. Try to make both global and local css changes and see how it looks.
Using OpaqueTokens
It's easy enough to create shared services and forked frontend code with this Seed, but soon enough you will need to integrate a plugin that can only be used on mobile. This integration must be shielded from the web, as it will break the web frontend if not done properly. Enter the wonderful world of OpaqueTokens!
If, for example, you wanted to use a special Audio plugin in your NativeScript app, but didn't want that plugin to be exposed to the web view, you would inject a string token representing that plugin at runtime. For the token to be available during the dependency injection process you setup providers for the token.
Let's use a Loader plugin that will only be available for the mobile app.
Exercise: Setup a plugin and a token
First, install the plugin in your NativeScript app:
cd nativescript
tns plugin add nativescript-loading-indicator
Note, you may need to rebuild the app to make the plugin install properly (
npm run start.ios/android)
Now set up the token system. First, take a look at the 'switchboard' of your app: src/app/frameworks/sample/sample.module.ts. This is the main ngModule of your app and it needs to include a master file of tokens that we are going to call token.ts.
In sample.module.ts, make the following edits:
At the top, under the block of imports for 'app', add this line:
import { TOKENS_SHARED } from '../core/tokens';
Then, edit the Providers array:
providers: [
  NameListService,
  PokemonService,
  TOKENS_SHARED
],
Now, create a file in src/app/frameworks/core called tokens.ts and paste the following code in this file:
import { OpaqueToken } from '@angular/core';

export const LOADER: OpaqueToken = new OpaqueToken('LoadingIndicator');

export const TOKENS_SHARED: Array<any> = [
  { provide: LOADER, useValue: {} }
];
Then, edit nativescript/app/native.module.ts in a similar way to add a reference to tokens only available to the mobile app:
At the bottom of the 'app' block of imports, import a native token file reference:
import { TOKENS_NATIVE } from './tokens.native';
Edit the import block at the bottom as well:
CoreModule.forRoot([
    TOKENS_NATIVE,
    { provide: WindowService, useClass: WindowNative },
    { provide: ConsoleService, useValue: console }
  ]),
Now create a file in this folder called tokens.native.ts.
import { LOADER } from './app/frameworks/core/tokens';
import { LoadingIndicator } from 'nativescript-loading-indicator';

export const TOKENS_NATIVE: Array<any> = [
  { provide: LOADER, useClass: LoadingIndicator}
];
Similarly, edit the web module: src/client/web.module.ts, adding a reference to web tokens at the top, in the 'app' block of imports:
import { TOKENS_WEB } from './tokens.web';
Complete the integration by adding the tokens as a provider:
CoreModule.forRoot([
    TOKENS_WEB,
    { provide: WindowService, useValue: window },
    { provide: ConsoleService, useValue: console }
  ]),
Add a file called src/client/tokens.web.ts with a blank array (you could populate this later with other types of tokens)
export const TOKENS_WEB: Array<any> = [
  //empty for now
];
Now you can reference the native tokens you built in your mobile code. Replace the current code in src/client/app/component/home/home.component.ts with the following:
// libs
import { BehaviorSubject } from 'rxjs/BehaviorSubject';
import { OnInit, Inject } from '@angular/core';
import { LOADER } from '../../frameworks/core/tokens';
import { Config } from '../../frameworks/core/utils/config';

// app
import { BaseComponent } from '../../frameworks/core/index';
import { PokemonService } from '../../frameworks/sample/index';

@BaseComponent({
  moduleId: module.id,
  selector: 'sd-home',
  templateUrl: 'home.component.html',
  styleUrls: ['home.component.css']
})
export class HomeComponent implements OnInit {

  public pokemon$: BehaviorSubject<Array<any>> = new BehaviorSubject([]);

  constructor(
    public pokemonService: PokemonService,
    @Inject(LOADER) private LoadingIndicator: any
    ) {}

  ngOnInit() {
    if (Config.IS_MOBILE_NATIVE()) {
      this.LoadingIndicator.show();
    }
    this.pokemonService.getPokemon()
      .subscribe((pokemon: Array<any>) => {
          this.pokemon$.next(pokemon);
          if (Config.IS_MOBILE_NATIVE()) {
            this.LoadingIndicator.hide();
          }
      });
  }
}
Now you are able to view the loading indicator on mobile only; it is shielded from the web view.
CHALLENGE!: Play with tokens - add a new web-only token, or a new mobile only token. Several tokens are integrated into PocketRave.
Bonus: Running a test
As a brief demo, we're going to look at how unit tests can be integrated into this app. There is already built-in functionality to test; we simply need to edit what we're testing so the tests will pass. All we're actually testing for is that our <h1> contains the words 'I love Pokemon!'
Exercise: Write a test
Unit tests are associated to each folder; there are a few in the src/cient/app/components/home folder, so navigate there and paste the following into the home.component.spec.ts file:
import {TestComponentBuilder, TestBed} from '@angular/core/testing';
import {Component} from '@angular/core';
import {FormsModule} from '@angular/forms';
import {RouterModule} from '@angular/router';

// libs
import {provideStore} from '@ngrx/store';
import {TranslateModule} from 'ng2-translate/ng2-translate';

import {t} from '../../frameworks/test/index';
import {TEST_CORE_PROVIDERS, TEST_HTTP_PROVIDERS, TEST_ROUTER_PROVIDERS} from '../../frameworks/core/testing/index';
import {NameListService, nameListReducer, PokemonService} from '../../frameworks/sample/index';
import {TEST_MULTILINGUAL_PROVIDERS} from '../../frameworks/i18n/testing/index';
import {HomeComponent} from './home.component';

// test module configuration for each test
const testModuleConfig = () => {
  TestBed.configureTestingModule({
    imports: [FormsModule, RouterModule, TranslateModule.forRoot()]
  });
};

export function main() {
  t.describe('@Component: HomeComponent', () => {

    t.be(testModuleConfig);

    t.it('should work',
      t.async(t.inject([TestComponentBuilder], (tcb: TestComponentBuilder) => {
        tcb.createAsync(TestComponent)
          .then((rootTC: any) => {

            rootTC.detectChanges();

          });
      })));
  });
}

@Component({
  providers: [
    TEST_CORE_PROVIDERS(),
    TEST_HTTP_PROVIDERS(),
    TEST_ROUTER_PROVIDERS(),
    provideStore({ names: nameListReducer }),
    NameListService,
    PokemonService,
    TEST_MULTILINGUAL_PROVIDERS()
  ],
  selector: 'test-cmp',
  directives: [HomeComponent],
  template: '<sd-home></sd-home>'
})
class TestComponent {

}
Then, in the same folder, paste this code into home.component.e2e-spec.ts:
import {t} from '../../frameworks/test/index';

declare var browser: any, element: any, by: any;

t.describe('Home', function () {

  t.be(function () {
    browser.get('/');
  });

  t.it('should have correct h1', function () {
    t.e(element(by.css('sd-app sd-home h1')).getText()).toEqual('I love Pokemon!');
  });


});
You should now be able to run a test to check whether the <h1> tag is correct by typing npm test into a terminal at the root of your project.
Note: Delete the files
app.component.spec.tsandapp.component.e2e-spec.tsto get these tests to pass
CHALLENGE!: Test something else!
Congratulations! You have built a service, customized a web and mobile app at the same time, tweaked its UI, and tested it! Just think of all the amazing web sites and apps you'll be able to spin up in the near future.
SUPER ULTIMATE CHALLENGE
It’s the end of the day, therefore you’re more ready than ever for the SUPER MEGA ULTIMATE CHALLENGE. That’s right, get ready to test your NativeScript skills against the biggest and baddest data form that we can reaslistically tackle in an hour. Get pumped.
What’s the challenge?
Your challenge, should you choose to accept it, is to build a form that collects four pieces of information from the user: a name, an email address, a date of birth, and whether they’d like to sign up for a newsletter. You’re welcome to design this form however you’d like, and you totally might want to use the new NativeScript theme, but here’s one lackluster UI you can try to replicate:
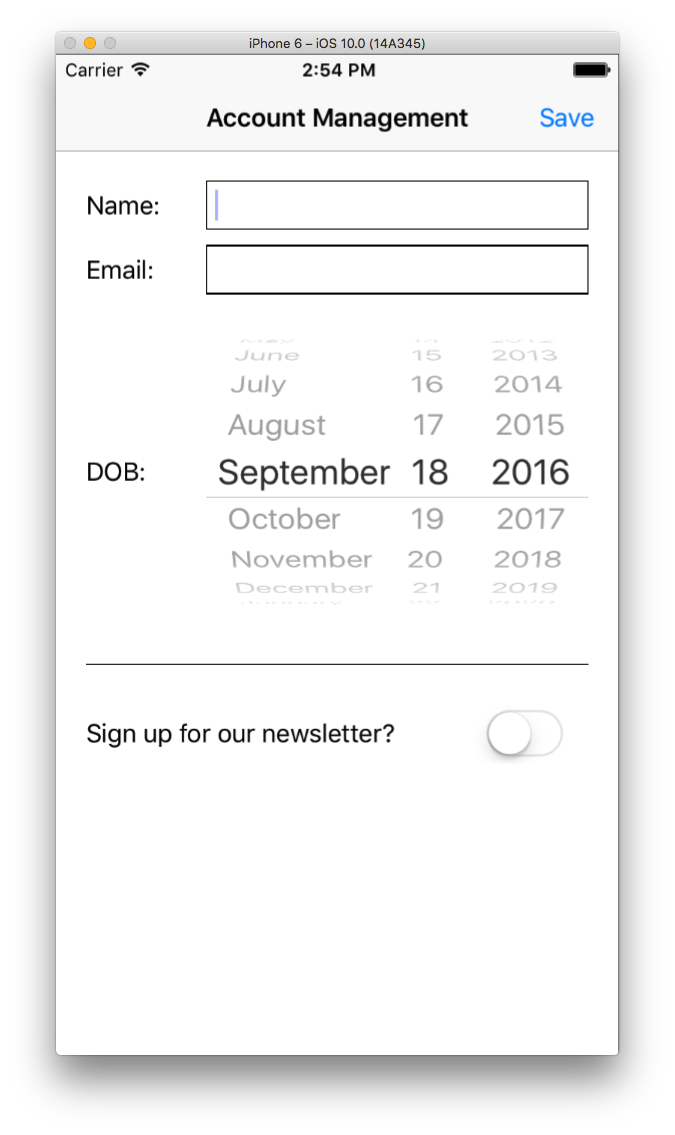
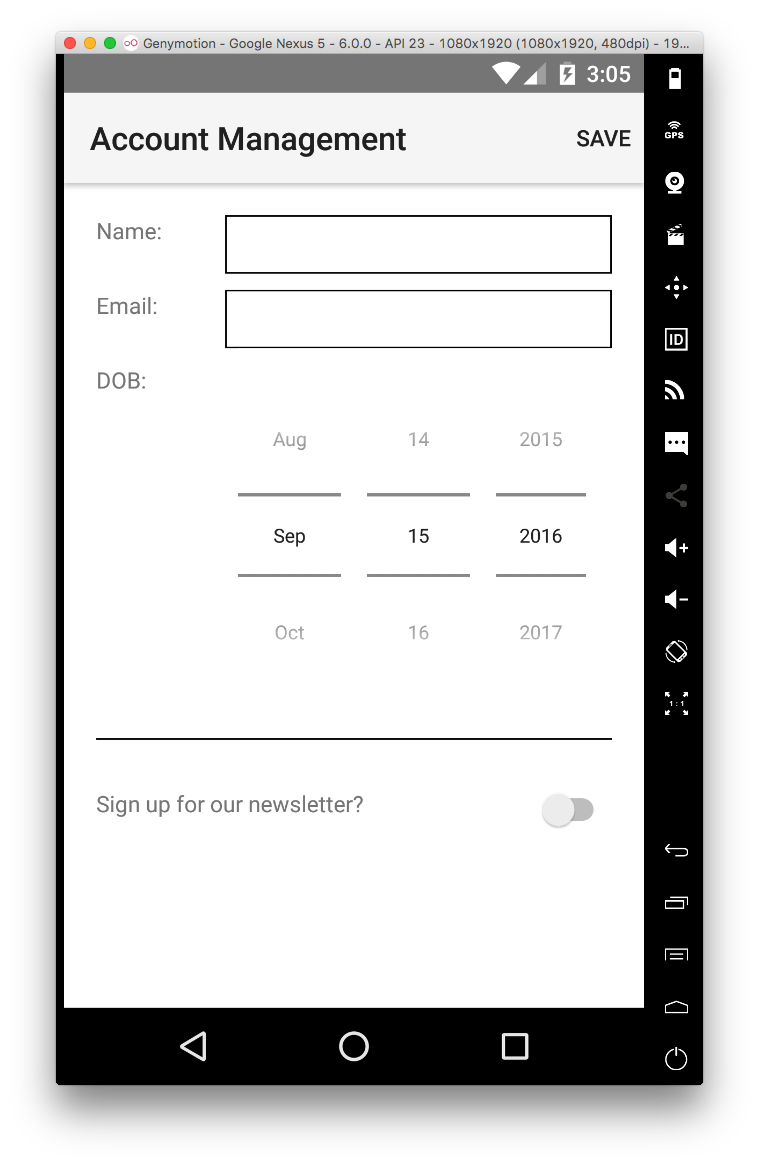
The form should send a POST request to the following endpoint:
https://api.everlive.com/v1/GWfRtXi1Lwt4jcqK/Accounts
The body of the request should be a JSON stringified object that has the following four keys: Name, Email, DOB, and Newsletter. (Don’t worry about the specific formatting of the individual paramters; aka, send an date format you’d like for DOB, and any boolean format you’d like for Newsletter.)
There’s a simple listing of all data that has come through hosted at https://jsfiddle.net/dLvz083w/. If you see your data on this list you’ve completed the challenge successfully.
And if you finish, there are some super special bonus challenges for you to tackle.
Starting up the challenge
Exercise: Start up a new app
Every good challenge starts with a new app. For this challenge go ahead and start a new blank project with the tns create command.
tns create CHALLENGE --ng
Next, change directories into your new project:
cd CHALLENGE
After that, open your main.ts file and replace its contents with the code below, as you’ll be needing both the NativeScriptFormsModule and NativeScriptHttpModule to complete this challenge.
import { platformNativeScriptDynamic, NativeScriptModule } from "nativescript-angular/platform";
import { NativeScriptFormsModule } from "nativescript-angular/forms";
import { NativeScriptHttpModule } from "nativescript-angular/http";
import { NgModule } from "@angular/core";
import { AppComponent } from "./app.component";

@NgModule({
  declarations: [AppComponent],
  bootstrap: [AppComponent],
  imports: [
    NativeScriptModule,
    NativeScriptFormsModule,
    NativeScriptHttpModule
  ]
})
class AppComponentModule {}

platformNativeScriptDynamic().bootstrapModule(AppComponentModule);
Finally, create a account.service.ts file in your app folder and paste in the following code. You’ll need this service to hit this challenge’s backend that we’ll discuss momentarily. You’ll have to figure out how to use this service like you did in chapter 4.0.
import { Injectable } from "@angular/core";
import { Http, Headers } from "@angular/http";
import { Observable } from "rxjs/Rx";
import "rxjs/add/operator/catch";
import "rxjs/add/operator/map";
import { Account } from "./account";

@Injectable()
export class AccountService {
  constructor(private http: Http) {}

  add(account: Account) {
    let headers = new Headers();
    headers.append("Content-Type", "application/json");

    return this.http.post(
      "https://api.everlive.com/v1/GWfRtXi1Lwt4jcqK/Accounts",
      JSON.stringify({
        "Name": account.name,
        "Email": account.email,
        "DOB": account.dob,
        "Newsletter": account.newsletter
      }),
      { headers: headers }
    )
    .catch((error) => {
      console.log(error);
      return Observable.throw(error);
    })
  }
}
And with that, you’re ready to get started.
Tips to help you out
Below you’ll find a few tips if you find yourself getting stuck, and a few suggestions for how you improve this little app if you have some extra time. Towards the end of the hour we’ll share a full solution that you can refer to later.
Exercise: TIPS
Stuck? Here are a few tips that might help you get this form up and running.
- Tip #1: You can use
[(ngModel)]to bind to<TextField>,<DatePicker>, and<Switch>UI components. You’re going to want to use something like this:
<TextField [(ngModel)]="account.name"></TextField>
<DatePicker [(ngModel)]="account.dob"></DatePicker>
<Switch [(ngModel)]="account.newsletter"></Switch>
- Tip #2: You can create a divider in your UI with the following bit of XML and CSS.
<StackLayout class="divider"></StackLayout>
.divider {
  height: 1;
  background-color: black;
  margin-top: 20;
  margin-bottom: 20;
}
Here’s a full solution you can refer to if you’d like: https://gist.github.com/tjvantoll/5d16e7f81de3d73573c7cb79752721e3.
Bonus challenges!
Finish the challenge? Most excellent. But wait, there’s more! Here are some ways you can improve this form. See how many of these things you can finish in an hour.
- While saving the form disable all form fields so the user cannot interact with them. Hint: You can bind to the
isEnabledproperty that all form fields have. - Show an activity indicator while the form is submitting. There’s a handy ActivityIndicator UI component that’ll work nicely for this.
- Show an alert after the form successfully submits, and also when something goes wrong. Refer to the dialogs module for more information.
- Don’t allow the user to submit with an empty name or email. Show an alert, or even find a more custom way to display an error message on your form.
And that’s it. When you’re done make sure to show us how far you made it 😀
Where to go from here?
Congratulations! You’ve completed the NativeScript workshop 🎉
Regardless of what you choose to do with NativeScript, joining the NativeScript community is a great way to keep up with the latest and greatest in the NativeScript world. Here are some ways you can get involved:
- Join the NativeScript Community Slack. The community Slack is a great place to ask questions, and chat with others in the NativeScript community.
- Follow @nativescript on Twitter for updates on all things NativeScript.
- Sign up for the NativeScript newsletter. The newsletter will deliver NativeScript articles, news, plugin updates, and more straight to your inbox.